
Amazon Drivers App
Amazon Drivers App – Our website is maintained by our users. We sometimes receive affiliate links when you click on affiliate links on our website
Flexible income opportunities are endless for anyone with a smartphone and a car these days, but not all apps are created equal.
Amazon Drivers App

/cdn.vox-cdn.com/uploads/chorus_asset/file/24288820/Screenshot_20221213_120504.png?strip=all "Amazon Drivers App")
To determine if an Amazon delivery driver job is right for you, you need to know how Amazon Flex works from initial setup to first package delivery.
Amazon Ends Use Of Tips To Meet Drivers’ Wage Guarantees
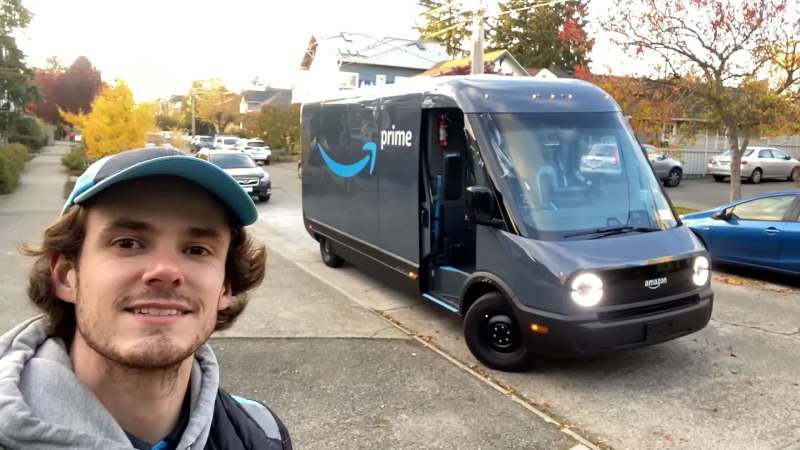
If you haven’t heard of Amazon Flex, it’s a delivery driver program that allows independent contractors to use their own vehicles and earn money on their own schedule.

Amazon Flex drivers play a key role in supporting the company’s full-time operations by working shifts when demand is high — all earning the highest hourly wages in the gig economy.
But no matter how attractive the job description, the app interface can make or break the driving experience.
The Amazon Flex app is a platform used by the program’s delivery partners to manage and complete delivery shifts, returns and account information.
Join Amazon Flex And Start Delivering For Amazon Singapore
Like the Postmates Fleet app, this mobile app is an essential tool for anyone looking to monetize their platform.
Before we get started, please note that Amazon Flex is known to be a bit buggy, despite being powered by one of the biggest brands in the world.
If you follow along and encounter any errors along the way, you may need to stop, exit and reopen the app, uninstall and reinstall the platform, or if all else fails, contact Amazon Flex Support.

In this section, we explain which phone models can run the platform properly, and how to download and install the app on iOS and Android.
Amazon Flex Pay: When & How Drivers Are Paid
Amazon Flex requires Apple users to have smartphones running iOS 11.0 or later. iPhone 5s and later models are generally eligible.
Note: The App Store listing states that at least iOS 13.0 is required to run the app, so Amazon’s written requirements for smartphones may be out of date.
If you meet these requirements, you can proceed with the Android app download process, which is a little more complicated than the usual download from the Google Play Store:
The Amazon Flex app is the only place you can sign up to become a delivery driver.
Amazon’s New On Road Technology Improves Safety For Drivers
Fortunately, the application registration process for Amazon Flex is very easy as long as you meet all the basic requirements.
Enter the permissions that the Amazon Flex app asks for, then tap Get Started to answer a few quick questions, including your zip code, availability, and mode of transportation.
If you qualify, you can submit the necessary documents, tax information, and bank account information before the background check is approved.

If there isn’t an Amazon Flex gig in your area, you can join the waiting list.
Wing Brings Drone Delivery Options To Doordash Customers In Logan, Australia
Once you’re fully approved and signed in to Amazon Flex, you can use the platform to schedule your first delivery blocks.
These are work shifts that last from 2 to 6 hours and are available seven days a week.
All Flex drivers must pre-order blocks available for distribution and winning as this is not a fully in-demand platform (although last minute moves may be available).
To schedule distribution blocks, go to the Offers section of the app, tap the blocks you want, then swipe to get them.
Wednesday Worklaw Alert: Amazon Flex Drivers Being Terminated By Automated System
When you receive a delivery block, it will appear in the Calendar section of the Amazon Flex app.
If you can’t move, tap the correct shift in this section and tap “Reject shift” at least 45 minutes before the start time.
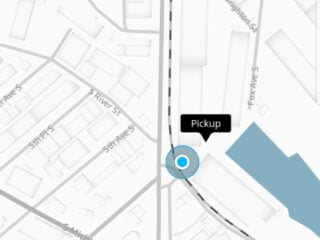
One hour before your shift starts, the Amazon Flex app will display your starting location.

To get there, the company recommends using in-app navigation, but many drivers prefer to open their own secondary navigation app because Amazon Flex directions aren’t as intuitive as on other platforms.
What Is Amazon Flex And How Much Does It Pay?
When you arrive at your delivery location (usually a designated delivery station, Amazon Locker, or warehouse), follow any signs if necessary, then tap I’m here.
An employee will then greet you and scan your arrival code, then direct you to the delivery items you need to pick up.
During the delivery process, you must use the in-app navigation to navigate the route and complete the delivery.
When you arrive at each destination, you must scan the correct packages and choose where to leave the package.
Amazon No Longer Tips Its Drivers When Customers Say, ‘alexa, Thank My Driver’
If you leave the package unattended, you must take a photo of it or obtain a signature if you leave it with someone other than the customer.
They are similar, but have additional features to help you access navigation mode.
This should be the same whether you have an iPhone or Android version of the app.

The home button does exactly what you’d expect: after logging in, it takes you to the first screen.
Amazon Delivery Drivers Told To Disable Safety Monitoring App To Meet Delivery Quotas: Report
It shows the next normal block and also includes a scroll menu to see other blocks coming your way.
You can see different types of blocks like Amazon Packages, Amazon Restaurants, Prime Now and Amazon Fresh.
When you highlight a block, the refresh button becomes the accept button, so if you’re not looking carefully, you can easily accept an unwanted block.
When you click on this orange dot, it will display information about the scheduled block and also offer the option to “Cancel Block”.
You Can Now Give Amazon The Keys To Your Car
If you cannot make a scheduled block, it is important to cancel at least 45 minutes before the block starts.
If you miss it within 45 minutes, you’ll get a computer-generated email that acts like a slap on the wrist.
This will open a screen with information about the blocks you’ve completed and the rewards you’ll receive.

If you need more information about earnings or deposits, you can click on any specific entry.
Amazon Flex Arrives In Sydney, Melbourne, Challenges Auspost
When you use this option, it will ask you which email client you want to use. Use the email account you’ve always used to sign in to Flex.
Changes to your address, email, bank accounts, phone number, tax status, and license must be completed in this section of the Amazon Flex application.
You can also click the Check for Updates button on this screen. Updates can take weeks, or seem to come every day for a period of time.
Developers add features that affect the app’s stability, so they need to add additional updates or remove features for it to work effectively.
How Much Do Amazon Flex Drivers Make In 2023?
You will need to log out and back in to properly access an update that you know is pending.
You probably don’t need to watch them because most of the presentation process is pretty simple, but if you forget something you learned during the training, you can always go back and watch it.
The help screen in Amazon Flex opens a list of various topics, including many frequently asked questions.

When you use this feature, it will ask you which email client you want to use to submit your issue.
Til The Amazon App Has An Option To Give Driver Feedback On Amazon Direct Deliveries. Go To Your Orders>ordered Item>track Package>’how Was Your Delivery?’ To Leave Feedback For All The Amazing Deliveries
Again, you must use the email address you provided when you signed up for Amazon Flex to submit your request.
This feature allows drivers to let Amazon know what you think about the app and the Flex program as a whole.
The only way for developers to know how their app is performing in real time is through user feedback.
If you have an idea or think you need help with the shipping process, contact them and let them know!
Amazon Has A Business Proposition For You: Deliver Its Packages
Navigation in Flex is powered by Bing Maps, which many Flexers agree is an unpopular navigation platform.
You don’t need to use in-app navigation, but GPS will still track your equipment.
From this menu, you can call the customer, call support, activate GPS location, mark the package as undeliverable, and return items.

If you use the “Fail” or “Revert” option, another screen will appear asking why.
Sweeten That Deal: These Price Comparison Apps Can Help You Save More
When you click on this, another screen will open showing the customer details along with any equipment provided by the customer or other Flexers.
If you scan the wrong package or are not in the specified area, the delivery options screen will not appear.
Often this is due to a faulty packet or the physical limit is far from the GPS pin.
If a household member is available, the app will ask for the name of the person you delivered to.
What Are Amazon Flex Blocks? 4 Things To Understand
If the delivery is not tracked, you will be asked to take a picture of the package.
Once you do this, the app will switch to album mode and display a signature box for the recipient to sign.
It is important to note that you may have a delivery to two separate locations, but it will be shown as multiple delivery addresses.

Once you have a “multiple shipping” address, select it


No Comments